There are multiple steps when constructing your Bionic Finger. They are all relatively simple though.
Step 1:
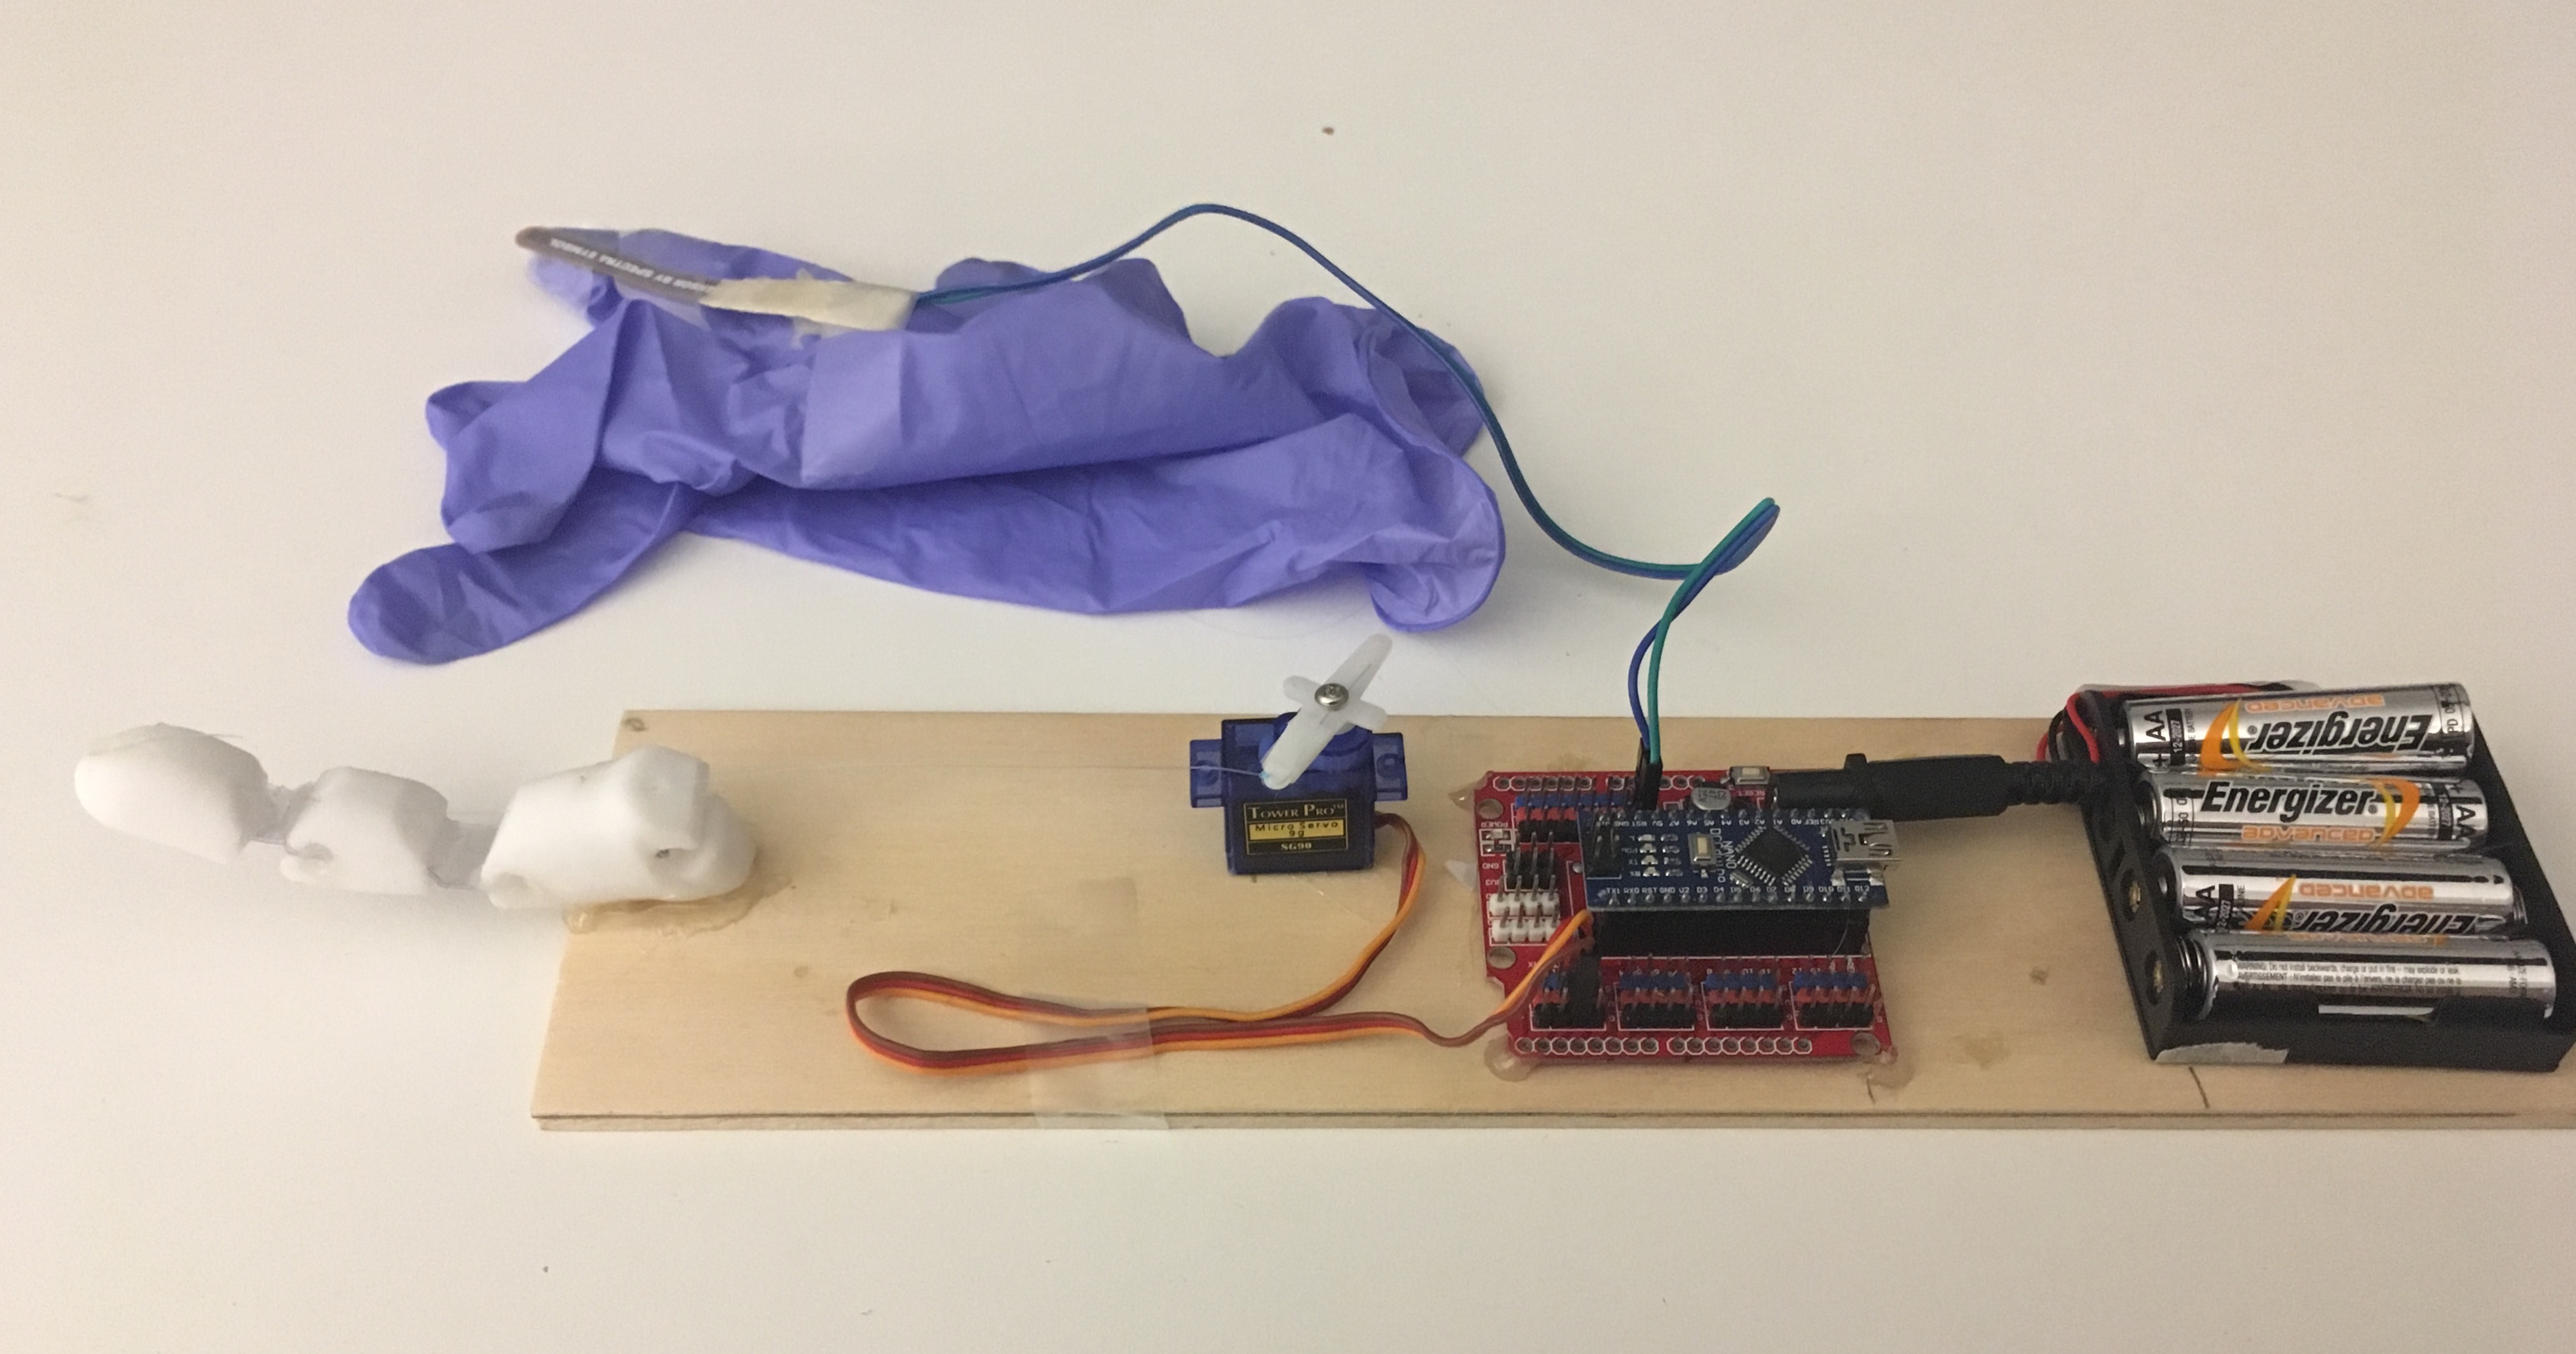
Lay all your components out so that you have a clear understanding of the materials.
Step 2:
Place your Wooden plank, Nano-Board, Batteries and Container, Flexi Strip and Servo into a separate pile.
Then place the Finger, Glove, Plastic Sheet, Fishing Wire and Hot Glue and Gun into another pile.
Lay the wooden plank down and place the Batteries at the end, then the Nano and finally the Servo. Make sure to leave enough room between each and space for the finger at the start.
Step 3:
With your glue gun, carefully glue each piece down. The glue is boiling and will burn skin. Make sure you DON'T place the glue on metal or the connection will cut out. If you accidentally get any on the metal, then wait for it to dry and then peel it off. There are other spaces where you can glue it down. Once you have glued it down, if you see necessary, run the glue along the edge, where the wood and material meet. Again don't do it if there is any metal.
Step 4:
Once you have completed these steps, you can move onto the construction of your Bionic Finger.
Cut the plastic sheet so that you have joints, that will slot into the finger. They musn't be too short, but also too long. The finger needs to be able to completely bend as well.
Step 5:
Once you have cut of these, you will glue them in place.
To do this you slot one of the pieces in and push a small sliver of glue into the hole. Once this has dried, you can connect it to the next finger part. Make sure that the fingers are the right way around. (It is avery big hassle to undo the glue and re-start).
Continue doing this until all the finger parts are connected and dry.
Step 6:
Using the fishing wire, thread it through the holes on top of the finger, starting at the base and working your way up to the tip of the finger. At the tip, glue the string in place and snip of excess wire.
Step 7:
Connect the end of it to the Servo hand. Make sure that when you glue it on, it is tight but not pulling. There can't be any slack and not to much strain. The finger should be in a resting position.
Step 8:
Once all these steps are complete, connect you Flexi Strip Cord and Servo Cord to the Nano-Board and give it a try.
Step 9:
If everything is running smoothly, then you can glue the Flexi Strip to the glove. Just make sure that you glue it on the right finger and facing the right way.
Step 10:
Try it out!!
You have successfully coded and constructed your very own Bionic Finger.